

Open the requests queue
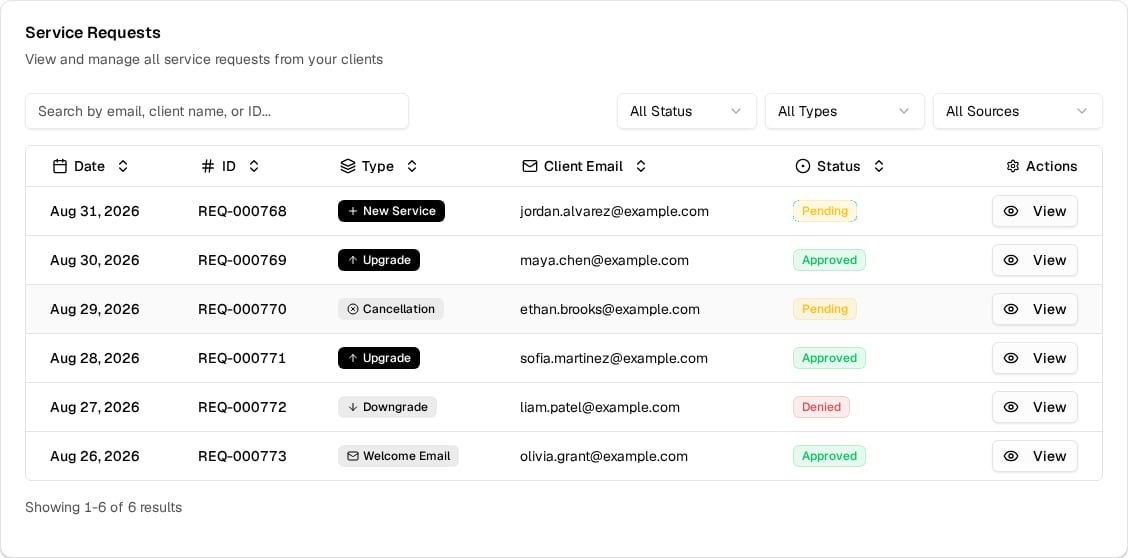
REQ-000000 format. Select a column heading to sort by date, ID, type, client email, or status.
Find a request
The search field matches client email, client name, or the formatted request ID. Combine it with the Status, Type, and Source filters to narrow the queue. The Source filter options are All Sources, Manual, Form, API, Broker Portal, and NYCServers Admin. A form filter also appears when your broker account has forms, so you can show requests from a single form. Any filter change returns the table to the first results page.Review a request
Approve a request
1
Open the request
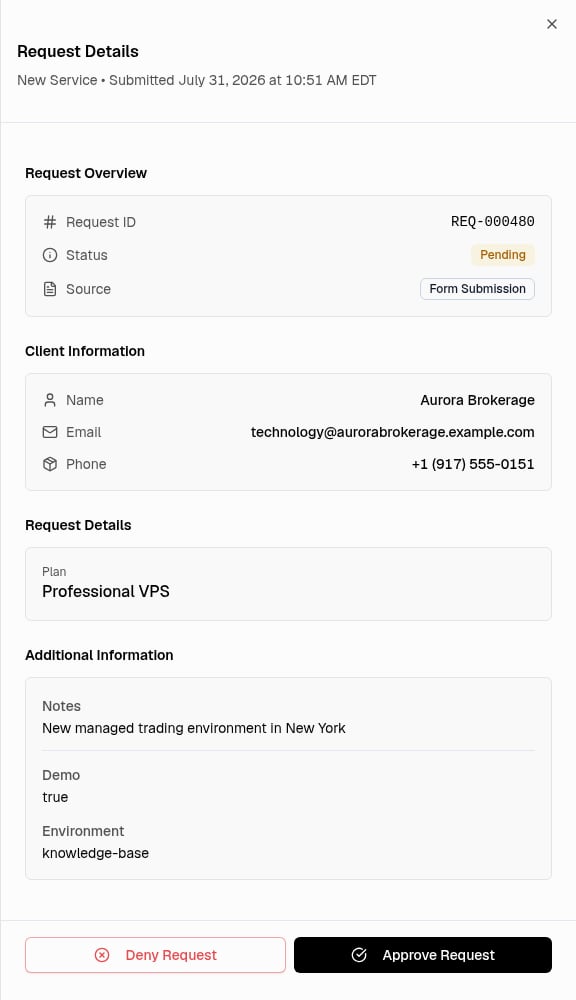
Open Request Details for the correct request and review the client and request information.
2
Start the approval
Select Approve Request. The dialog states that the client will be notified.
3
Confirm
Check the request ID, then select Approve Request again to confirm.
Approval starts the request’s work but does not mean that work is finished. The request status can update before the generated service work completes, so check the related service for its current status.
Deny a request
Open Request Details, select Deny Request, enter a required reason in Denial Reason, then confirm with Deny Request. The panel closes the sheet and the request shows Denied. Denying a request does not start its service work. The panel saves the reason with the request and shows it in Request Details, but it does not email the reason to the client.Request statuses
If setup hits a retryable problem, the panel shows Request sent for NYCS review and moves the request to NYCS Review.
What approval does for each request type
What approval does for each request type
Approval and denial errors
Approval and denial errors
A general approval error keeps the confirmation dialog open; try again shortly. A failed welcome email retry keeps the request pending for review. A denial error shows Failed to deny request with the returned error and keeps the request available. Review the message before you retry.